A Machine Windows 7 or Windows 8 with the The Windows Automated Installation Kit (AIK) Installed.
The install.wim image from the Windows 8 Release Preview ISO
A USB flash drive (Preferably 32gb or more , but a 16gb will work, just not very well)
Step 1: Gather Our Tools
Install the Windows Automated Installation Kit located at: http://www.microsoft.com/en-us/download/details.aspx?id=10333 if you do not already have it installed.
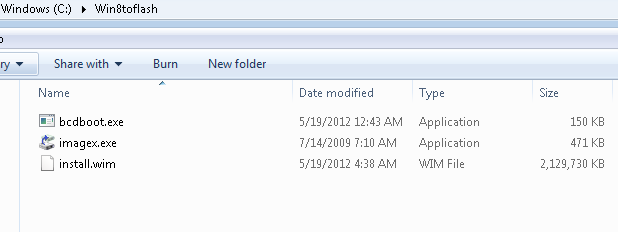
Create a folder to use as our working directory for ease of access. I prefer c:\wintoflash.
Insert your Windows 8 Release Preview disc (I've only tested with 32bit) and located in the sources directory on the root of the disc is a file called install.wim. Copy that to your working directory. (c:\wintoflash)
Next navigate to C:\Program Files\Windows AIK\Tools\x86. We'll want to copy the imagex.exe and bcdboot.exe to our working directory (c:\wintoflash) If bcdboot.exe is not located in this folder then it can be copied from C:\windows\system32\
Now we've assembled the tools we'll need to build our bootable flash drive.
Navigate to cmd in the start menu and right click and run as administrator to open the properly elevated cmd window.
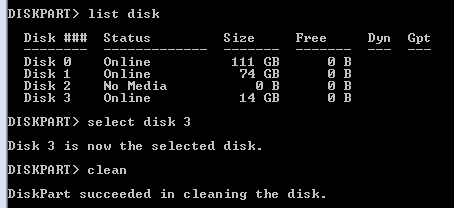
Type Diskpart
The prompt will display DISKPART> at the bottom. Type LIST DISK to find the flash drive's disk number.
Type SELECT DISK 3 (or the number you discovered is your flash in the above step)
Type Clean this will erase all existing partitions on the flash drive.
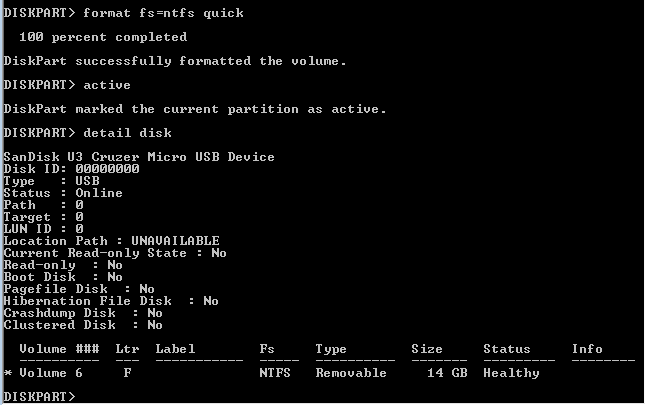
Type ACTIVE to set the partition as Active for booting.
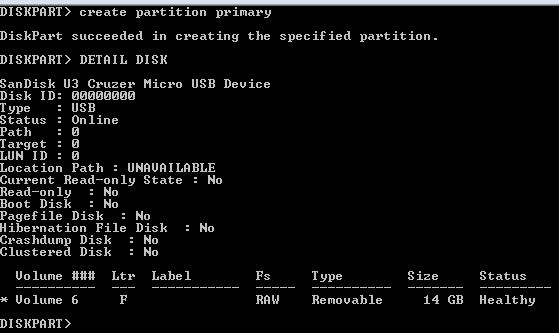
Type DETAIL DISK again to verify actions
Type Exit to leave diskpart utility
Type imagex.exe /apply c:\wintoflash\install.wim 1 I: (I: is the drive letter of the flash drive yours may be different).


 RSS Feed
