GIMMC, Global Internet Multimedia Center is a linux distribution designed as a back end server to feed XBMC or Plex front end media clients. It comes with Couch Potato, Headphones, Sickbeard, and Maraschino preinstalled and running at start up ready for your configuration. It comes with all the tools you need to build and organize your collection. XBMC 12.2 is also installed should you wish to use this distribution as a front end client for an all in one HTPC setup. Popular file sharing tools also included. This linux distrubtion was built in response to reading various support forums of people struggling understanding how to install these great opensource projects are there own. In the future I plan to release a front end distribution as well with xbmc preconfigured with popular addons for live tv and media tagging.
This Linux distribution was built with suse studio which will allow anyone to copy edit and test in a virtual machine via their site for free. Provided downloads include bootable flash drives, preload, and a live cd.
Downloads are located at http://susestudio.com/u/psiegel
Downloads are located at http://susestudio.com/u/psiegel
All Web Applications are running on their default standard ports:
CouchPotato:5050
Maraschino:7000
Sickbeard:8081
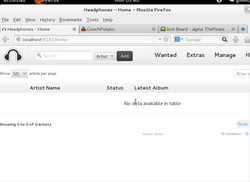
Headphones:8181
e.g. locahost:8081 to access Sickbeard.
CouchPotato:5050
Maraschino:7000
Sickbeard:8081
Headphones:8181
e.g. locahost:8081 to access Sickbeard.


 RSS Feed
